Programming notes: Using Tomcat connection pool on Spring Framework.
By isendev.
Posted on 2012/02/02 22:47.
Tagged as: programming, java, springframework.
Recently, I switched from the outdated (but reliable) c3p0 connection pool I was using in my blogging software to the more recent Tomcat 7 integrated connection pool. This is a code snippet from my Spring Framework bean configuration file that shows you how to configure a Tomcat connection pool with a MySQL database:
<!--
  Deploy a in-memory MySQL configured datasource using the Tomcat's integrated
  connection pool (DBCP). IMPORTANT! It's necessary to copy the MySQL JDBC library
  (.jar) to Tomcat's library folder ($CATALINA_HOME/lib).
-->

<bean id="dataSource" class="org.apache.tomcat.jdbc.pool.DataSource" destroy-method="close">

  <!-- Database driver class name -->
  <property name="driverClassName" value="com.mysql.jdbc.Driver" />

  <!-- DEV database -->
  <property name="url" value="jdbc:mysql://127.0.0.1:3306/dblog" />

  <!-- PROD database -->
  <!-- <property name="url" value="jdbc:mysql://127.0.0.1:3306/pblog" /> -->

  <!-- Credentials -->
  <property name="username" value="myuser" />
  <property name="password" value="mypassword" />

  <!-- TOMCAT connection pool parameters -->
  <property name="initialSize" value="0" />
  <property name="initSQL" value="SELECT * FROM USER" />
  <property name="minIdle" value="10" />
  <property name="maxIdle" value="100" />
  <property name="maxActive" value="100" />
  <property name="maxWait" value="6000" />
  <property name="jmxEnabled" value="true" />
  <property name="jdbcInterceptors"
    value="org.apache.tomcat.jdbc.pool.interceptor.ConnectionState;
    org.apache.tomcat.jdbc.pool.interceptor.StatementFinalizer" />
  <property name="removeAbandoned" value="true" />
  <property name="removeAbandonedTimeout" value="60" />
  <property name="logAbandoned" value="true" />
  <property name="testOnBorrow" value="true" />
  <property name="testOnReturn" value="false" />
  <property name="testWhileIdle" value="false" />
  <property name="useEquals" value="false" />
  <property name="fairQueue" value="false" />
  <property name="timeBetweenEvictionRunsMillis" value="30000" />
  <property name="minEvictableIdleTimeMillis" value="30000" />
  <property name="validationInterval" value="1800000" />
  <property name="validationQuery" value="SELECT * FROM USER" />

</bean>
Computer recycling: LEX Light CV860A.
By isendev.
Posted on 2012/01/30 00:21.

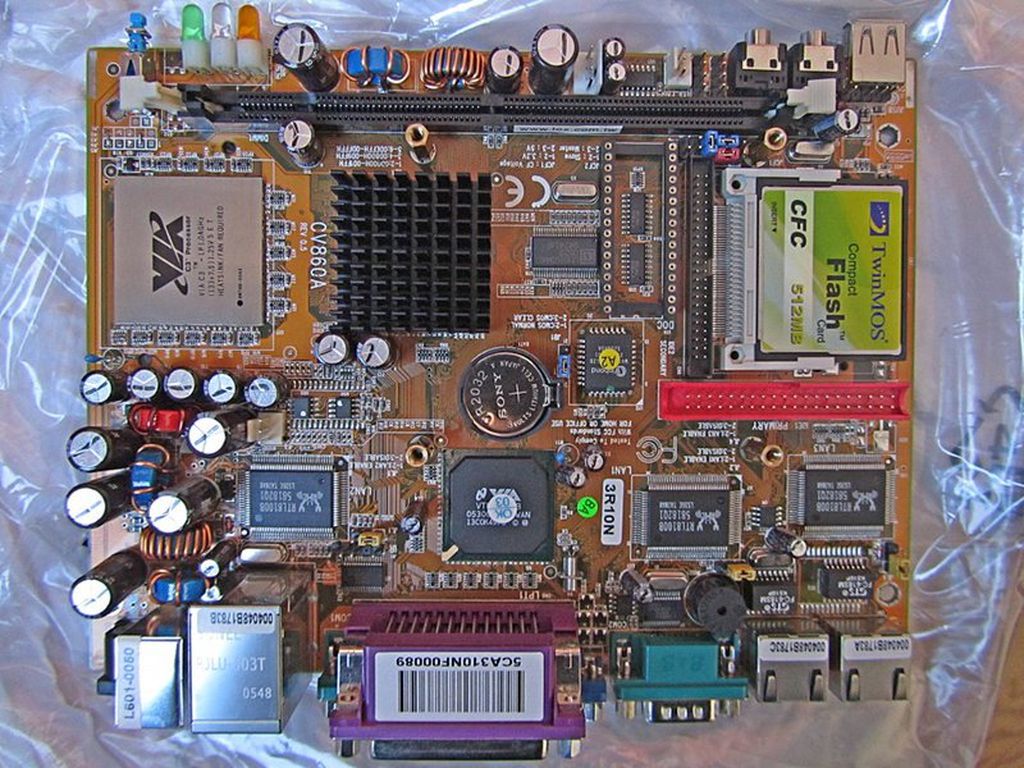
Some months ago, I found a very small (and dirty) computer case lying around my company’s e-waste recycling point. The box presented standard PC connectors, three LAN ports and no inscriptions on the case. Given my known penchant for disassembling electronic devices, I took it to my house to gather more information from its contents. After a deep cleaning session (involving the vacuum cleaner and the dishwasher) I was able to read the identification strings on the motherboard PCB.
The unknown device turns to be an old Lex Light embedded computer, built around a Lex CV860A-3R10N VIA motherboard, and normally used as thin-client or network device.
LEX CV860A-3R10N motherboard specifications:
- CPU: VIA C3 EBGA.
- Chipset: VIA PLE133 (North: VT8601A / South: VT82C686B).
- Memory: 1 x DIMM socket up to 512MB. SDRAM PC100 / PC133.
- LAN: 3 x Realtek 8100B 10/100B-T (Wake-On-LAN).
- VGA: VT8601A integrated graphic controller (64-bit 2D/3D display up to 1600 x 1200 / memory sharable up to 8MB.).
- Storage: 1 x 50-pin Compact Flash socket / One 32-pin Disk-On-Chip DOC2000 socket / One 40-pin IDE socket / One 40-pin IDE socket (2.5” HDD).
- Sound: AC97 2.1 Sound.
- Form Factor: LIGHT Board, 200mm. x 150mm.
- Power: DC +12V. (11.4V. to 12.6V.) power adapter input.

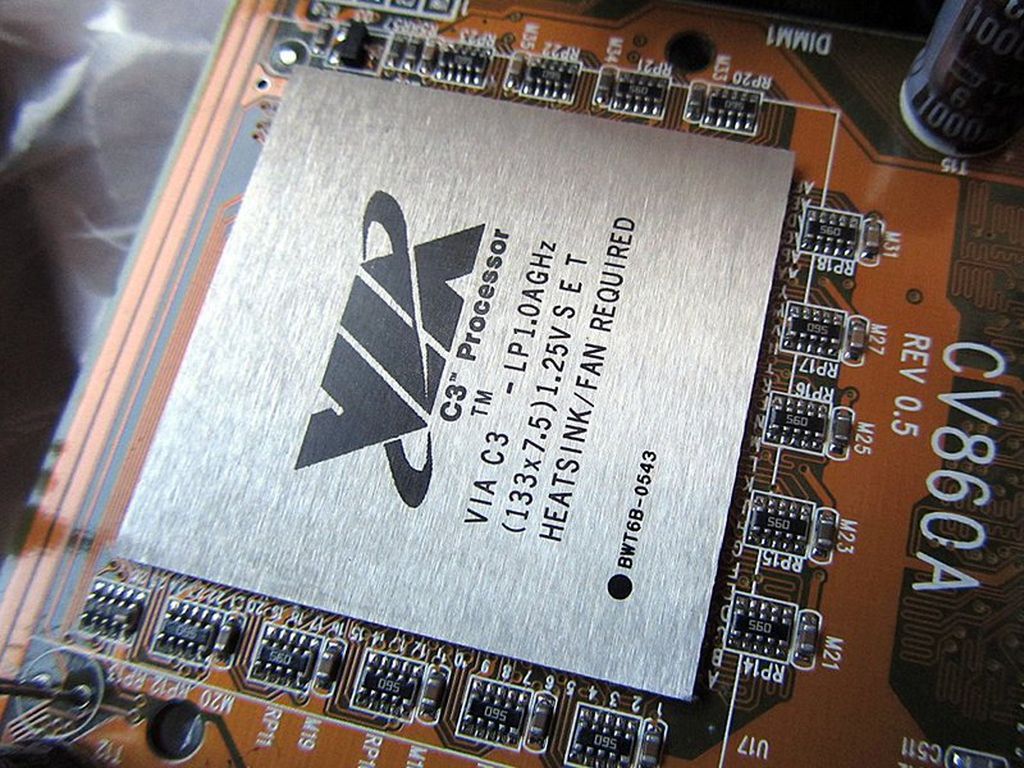
VIA C3 LP1.0A specifications:
- Core: VIA C3 Nehemiah core (130nm.).
- Clock: 1Ghz. (133Mhz. bus x 7.5 multiplier).
- Instructions: MMX, SSE.
- VIA PadLock (AES, RNG) security features.
- LongHaul/PowerSaver speed throttling and power saving technology.